Creating, Editing, and Deleting Accela Insights Reports
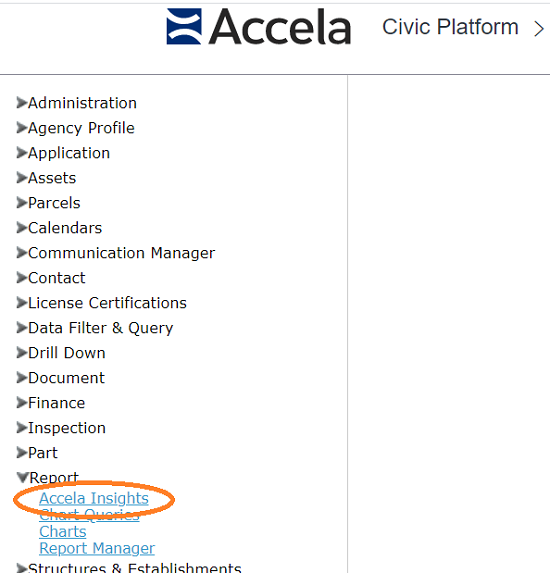
You can open Accela Insights from Accela Administration by clicking Report > Accela Insights.
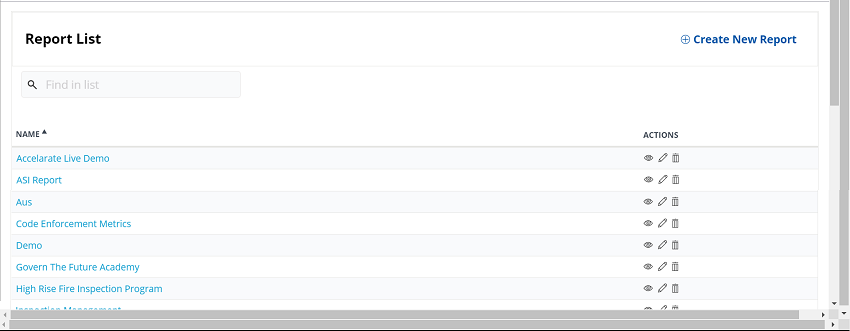
The Accela Insights home page appears, displaying a list of your reports.
From the Reports List, you can create a new report or view, edit, or delete an existing report.
Note:
Use the Search bar's smart filter abilities to find a specific report on the list. Enter any part of the name of the report you're trying to locate.
Open a report by clicking the report name or the clicking eye icon under Actions. The report will open in the view that end users will see when they open it.
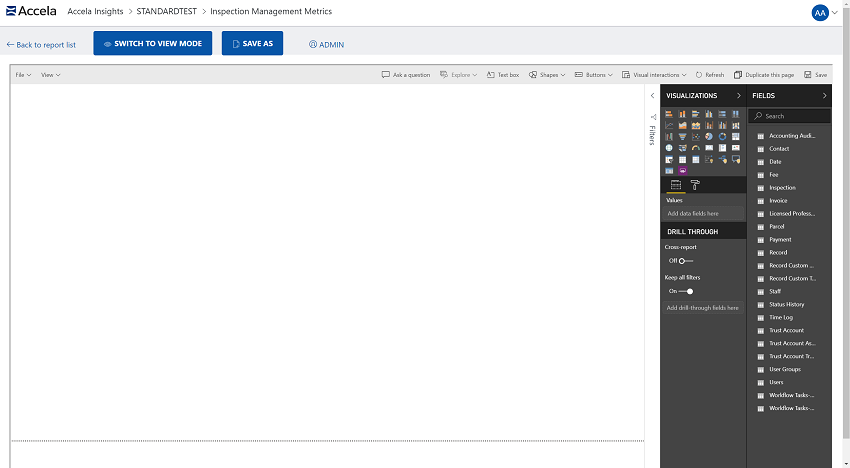
With a report open, you can toggle between view and edit modes.
Create a new Accela Insights report
From the Accela Insights Reports List, click Create New Report.
The Create New
Report pop up appears.
Type the name for the new report in the Name box.
Note: The report name must be unique and
cannot contain more than 100 characters.
Click Create Report.
The Report Editor opens.
You'll build the new report in the blank area on the left using the Power BI tools
available on the right.
Note:
At any point, you can rearrange elements in the report by dragging and
dropping them to a new location.
While creating a report, you can click Switch to View Mode to toggle
to the view that will be seen by report users.
Click Save periodically while building a report to protect against
losing work.
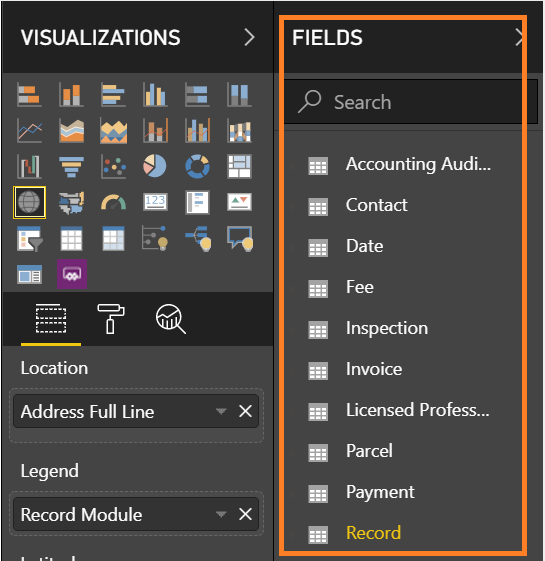
Add fields to the report from the Fields list.
Note:
The Field list contains the data elements available in the
specified data set. You can use the search bar to filter
this list—enter any part of the field name you're trying to
locate. Add a field to the report by checking it in the list
or by dragging and dropping it to the desired location in
the report area.
An up-to-date data dictionary of fields available for Accela
Insights reports is available on the Accela Community.
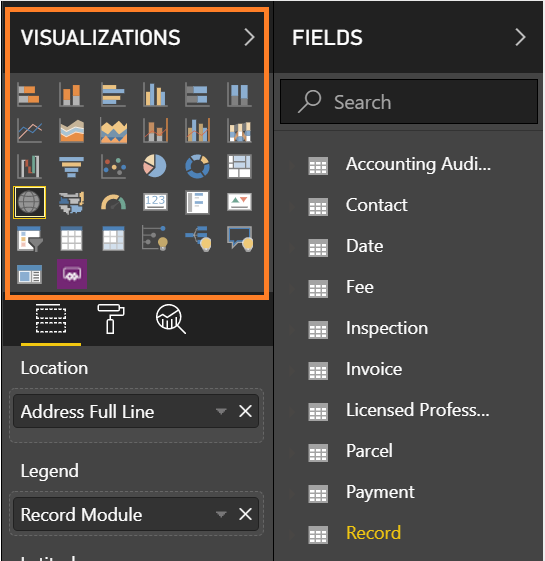
Apply the desired visualization to a report field by selecting the field in the report
and then clicking the desired visualization icon and configuring it.
Note:
Hover over a visualization icon for a description of what it
does. For more detailed descriptions of available
visualization types, see https://docs.microsoft.com/en-us/power-bi/create-reports/.
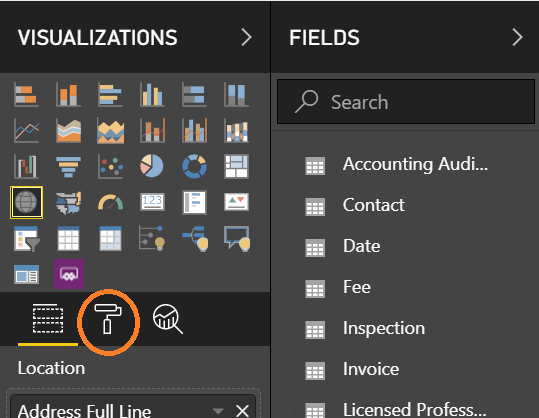
If desired, change formatting for a report element by selecting it in the report and
then clicking the formatting icon.
After completing the report, you are ready to save it.
Note:
Before saving a report, be aware of two things:
The Filters section located between the report editing
area and the editing tools can be expanded or collapsed.
Its status is saved with your report. That is, if it is
expanded when you save the report, it will be expanded
when users open the report. If it is collapsed when you
save the report, it will be collapsed when users open
the report.
If the report contains more than one page, the page that
is open when you save it will be the open page when end
users run the report.
When the report is complete, click Save.
Create a new Accela Insights report based on an existing report
The Save As function lets you create a new version of an existing report under a different name. Use this functionality to base a new report on an existing report without modifying the original.
From the Accela Insights Reports List, locate the report you want to use as a basis for the new one and click the pencil icon to open it in edit mode.
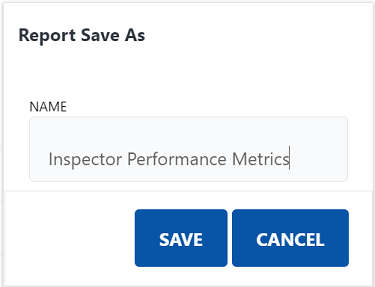
Click Save As and give the report the name you'd like to use for the new one.
The new report opens.
Make the desired changes and additions to the report.
Click Save to save your edits to the new report.
Edit an existing report
From the Accela Insights Reports List, locate the report you want to edit and click the
pencil icon under Actions.
Note: You can also edit a report that you currently have open by
clicking Switch to Edit Mode.
Make the desired changes.
Click Save.
Delete an existing report
From the Accela Insights Reports List, locate the report you want to delete and click
the trashcan icon under Actions.
The Delete Report confirmation pop up appears to
prevent accidental deletion of important reports.
Type the name of the report to be deleted in the Name box.
Note: The Name box is case
sensitive and requires an exact match of the report name. After a report has been
deleted it cannot be recovered.