Custom Fields Lookup Tables provide fields for users to complete. They can also populate specific
data as a reference for an record type.
You assign the Custom Fields Lookup Table to a record type, and the Lookup data displays in the
Custom Fields section for that record type. You can also create Lookup Tables for
use with expressions. With Expression Builder, administrators can design Lookup
Tables to populate data into other fields in the Custom Fields section of a record,
add a new row to the end of a Custom Fields Lookup Table, or store new data in a
Custom Fields Lookup Table.
To use the Custom Fields Lookup Tables feature, you must first create the Custom Fields group in
Classic Administration.
After you create a Custom Fields Lookup Table, you can apply it or its column data to a record
via Expression Builder (Using Expression Builder).
When creating an expression you can include criteria so the Lookup Table gets a new
row added to it. For example, you can specify that if a field value for a Custom
Field has the option “R2” selected, specific data will be added to the end of the
Lookup Table.
You can also add data into a specific cell of a Lookup Table based on matching criteria. For
example, if a user enters “R4” into the Zone field, then you can add a corresponding
row of data to the Lookup Table.
Enter a lookup table name in the Lookup Table Name field associated with
the Custom Fields Group Code for that record type.
Click Submit.
Civic Platform adds the new
column to the Custom Fields Lookup Table list.
Repeat for each new column required for the table.
Click the Table Data tab to set up the content for the row cells within
each column.
In the first field of the new row, add the text of other content as required.
Optionally, click New to add other rows to the Custom Fields Lookup
Table.
Click Submit to save all modifications.
The Table Data updates to the
database successfully.
Table 1. Custom Fields Lookup Tables Fields You Can Modify
Column Name
An inactive new Column Name displays.
Complete and submit the Lookup Table Name and Record Type
fields. Then click Table Data and use the Record Type picker
to select a Record Type to associate the column to.
Lookup Table Name
In the Table Structure secondary tab: Add a
new name for the table. Lookup Table Name is a required
field.
Record Type
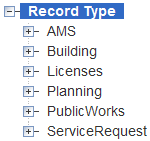
In the Table Structure secondary tab: Click
the record type using the Record Type picker. Use the plus
sign (+) to expand and select the record type you want to
apply the lookup table name to (record type is a required
field). Then select the Column Name from the drop-down list.
If the record type you select does not yet have a
Custom Fields Group Code associated with it, go to Classic
Administration > Application > Custom Fields and set up a
Custom Fields Group. Then use the Custom Fields Form Layout
Editor in Civic Platform to design the appearance and
function of those Custom Fields for that record
type.
Adding Custom Fields Lookup Table Rows and Columns
Use this page to specify the record type that contains the Custom Fields you want to add to a
Custom Fields Lookup Table. Based on the record type, you select the column data you
want to add to the table. Then use the Table Data to add rows and enter the
appropriate values, data or numerical values for each row in each column.
You can to add one or
more columns to the table.
Note:
To create a table structure you must first create a Custom Fields group and optionally, a
subgroup. You can do this by going to Classic Administration
> Custom Fields.
To create a Custom Fields lookup table name and add columns and data
In the Custom Fields Lookup Table Name detail portlet, complete these fields:
Lookup Table Name
Enter name to identify the table or its
columns or functions.
Record Type
Locate the record type to which you want to
expose Custom List data. If the record type you select has
no Custom Fields associated with it, you must use Classic
Administration to set up a Custom Fields group code. Then
use the Custom Fields Form Layout Editor in V360 Admin to
design the appearance and function of the Custom
Fields.
Click New Column to add additional columns to the Lookup Table. Specify the column name
for the drop-down list. Repeat this step for each new column required for the
table. Click Submit.
Civic
Platform updates the column data and the Lookup Table Name field and Record
Type field become inactive. You cannot modify these fields.
Click the Table Data tab to set up the content for the row cells within each column.
Click New to add a new row to the Lookup Table.
In the first field of the new row, add the text of other content as required. This information
populates for daily users to refer to as they process the record type.
Add additional rows and enter the data, text, or numerical values.
Click Submit to save all modifications.
The Table Data updates to the
database successfully.
Searching for a Custom Fields Lookup Table
To locate a Custom Fields Lookup table
Click Search.
Civic Platform displays the Custom
Fields Lookup Table search screen.
Enter the full name or the initial letters for the name in the Lookup Table Name field.
Click Submit.
Civic Platform displays search
results for you to choose from.
To return to the Custom Fields Lookup Tables portlet, click Search, clear the search fields, and
then Click Submit.
Editing Custom Fields Lookup Table Data
Use the Custom Fields Lookup Table portlet to add data or delete data from a row in a Custom
Fields Lookup Table.
To add data to or delete data from a row in a Custom Fields Lookup Table
From the Table Structure tab, mark the Column Name you need to add or remove data.
Click the Table Data tab.
Civic Platform displays the column names
and the current data for each row.
Do one of the following:
To add a row, click New and enter the data for
the new row. In the first field of the new row, add the text of other
content as required. This information populates for daily users as they
process the record type. This information displays in the Custom Fields
section of the record type.
To enter multiple row data, Click New Row.
To delete a row, mark the check box next to the row to remove from the
table and click Delete.
Civic Platform deletes
the record from the Table Data list
Click Submit.
"Table Data Created
Successfully" displays. Civic Platform saves the changes to the Custom
Fields Lookup Table Name.